Update imDocShare WebParts
Step-By-step instructions for how to update an existing Web Part:
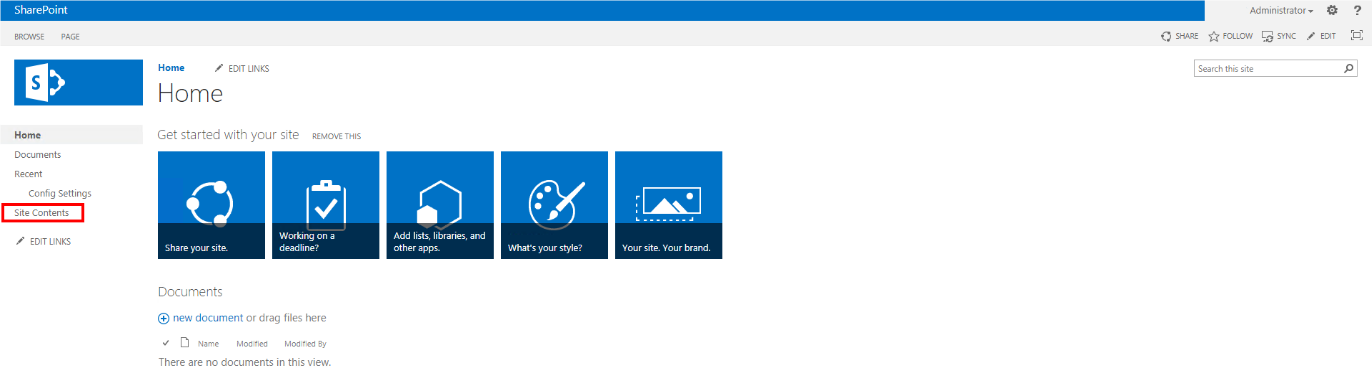
- From the Home page in your SharePoint account, navigate to Site Contents on the left-hand side menu.
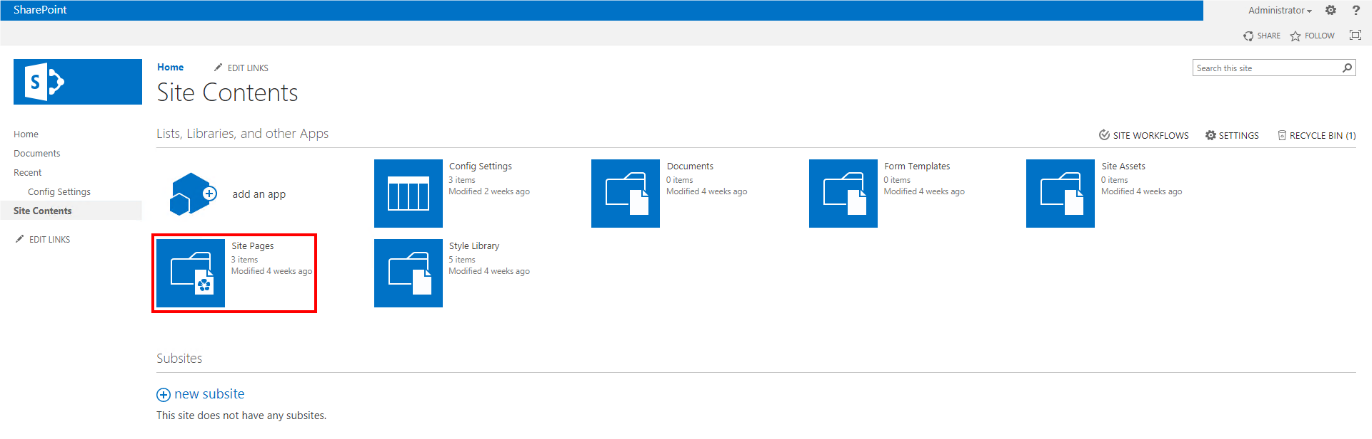
- Click Site Pages .
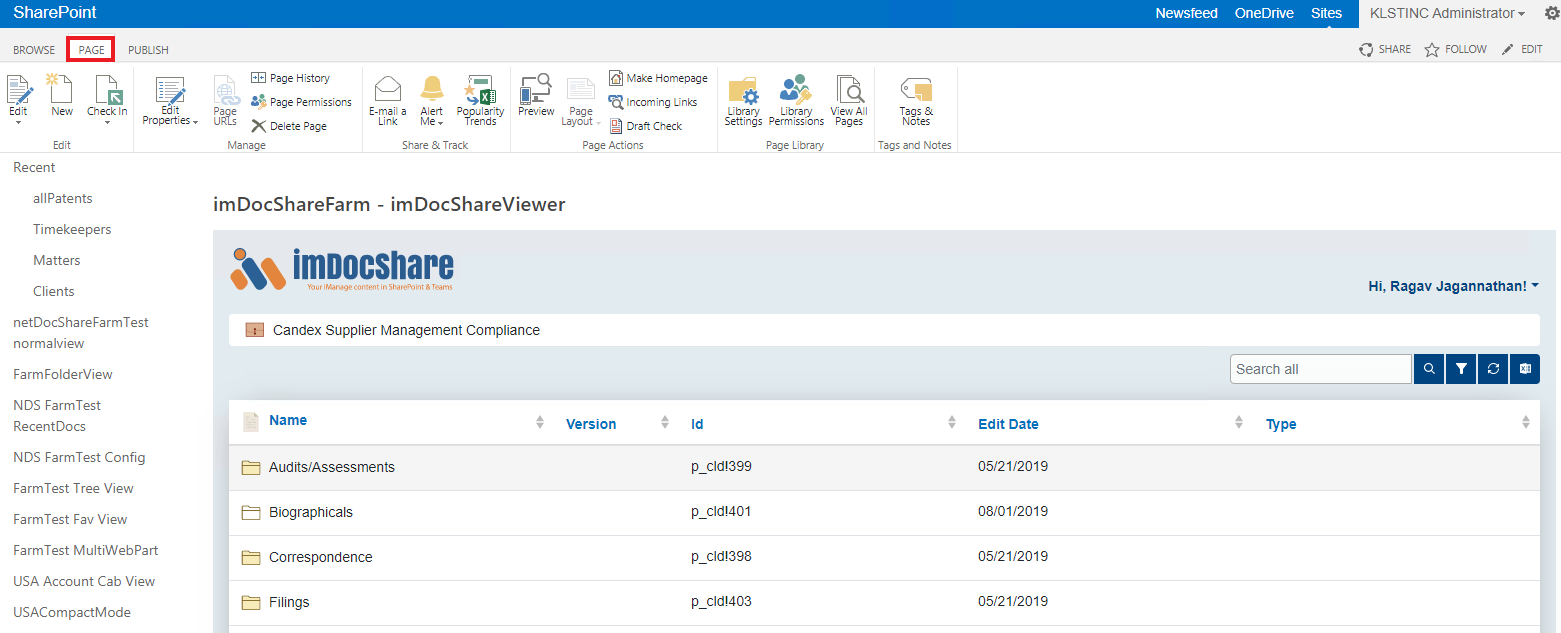
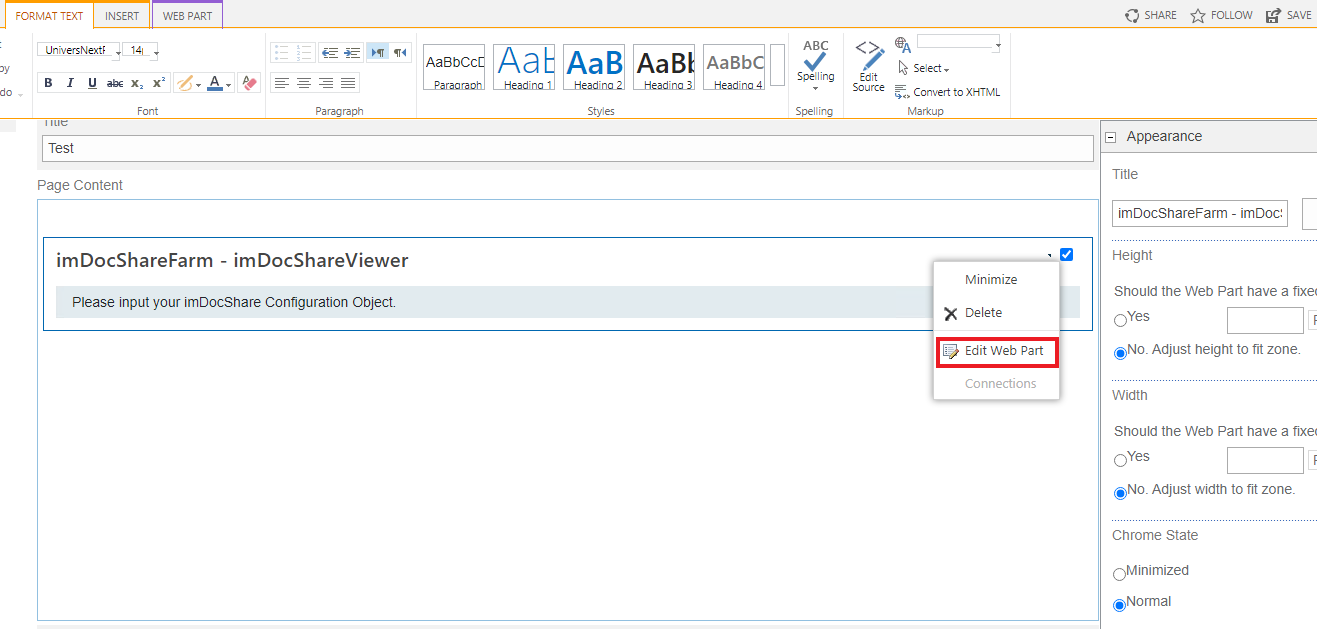
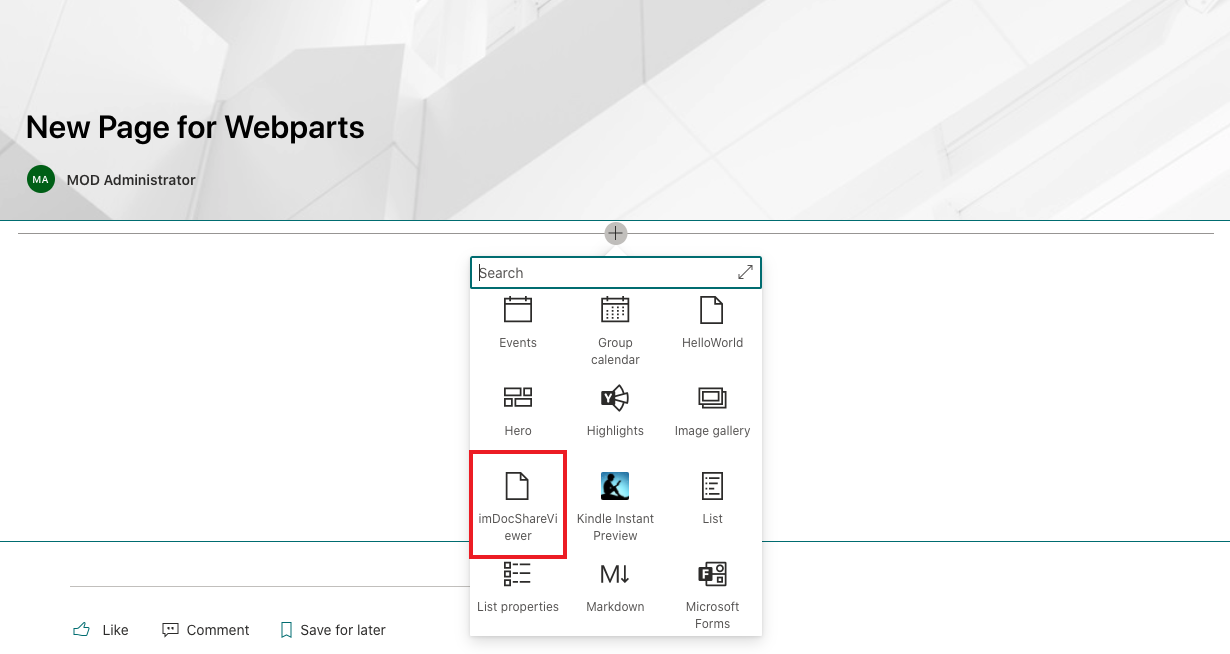
- Select the page in which you wish to edit the imDocShare Document Viewer Web Part. In the example below, we are selecting a “Test” page.

- Click Page in the upper left-hand corner.
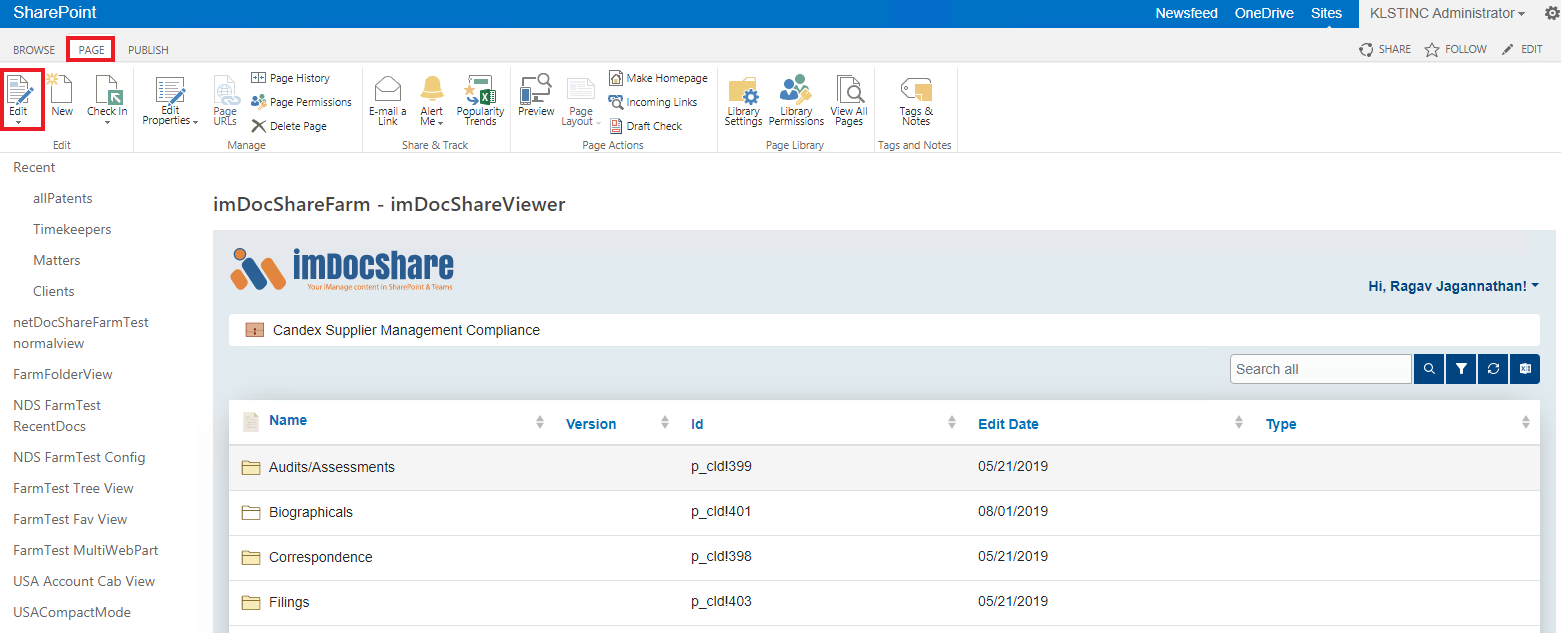
- Click Edit Page on the far left.
- Click the Web Part menu (small arrow in the upper right-hand corner) and then select Edit Web Part.
- Select Extended Settings at the bottom, and then select the ellipsis button to the right of the Config Settings field. Note: this feature only works in Internet Explorer browser.
If you are using a different browser, you can simply click inside the Config Settings field and paste the App-Configuration JSON Object directly.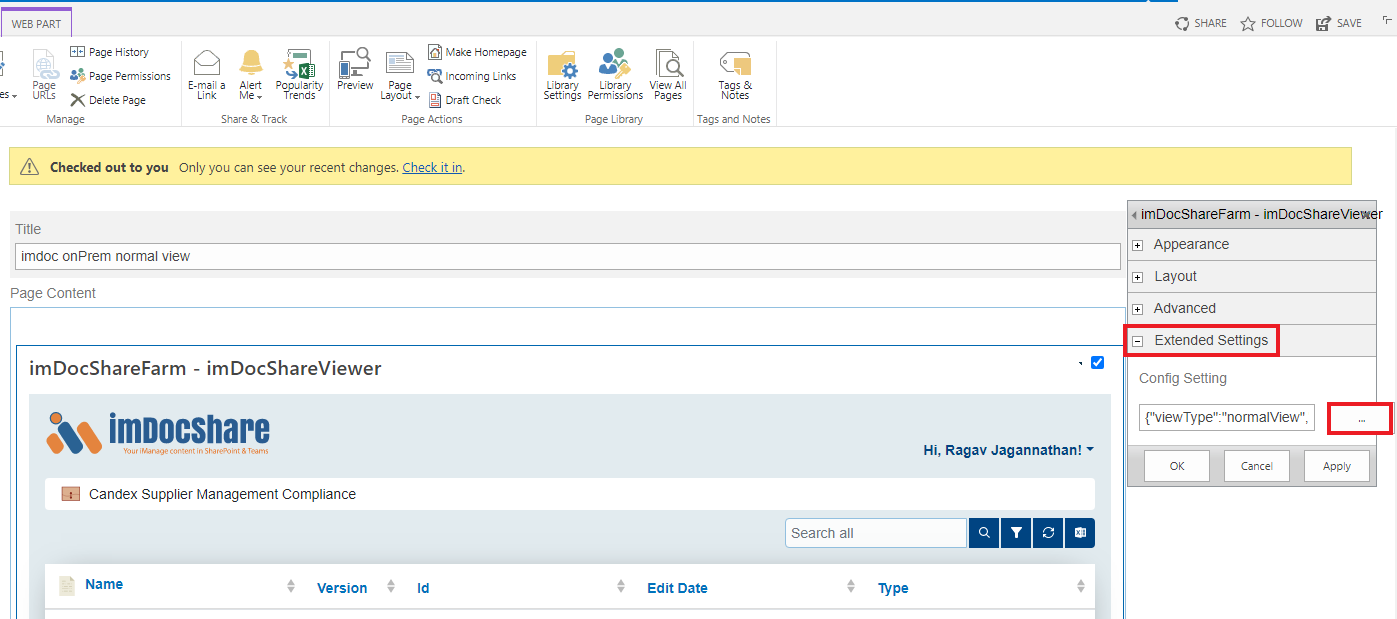
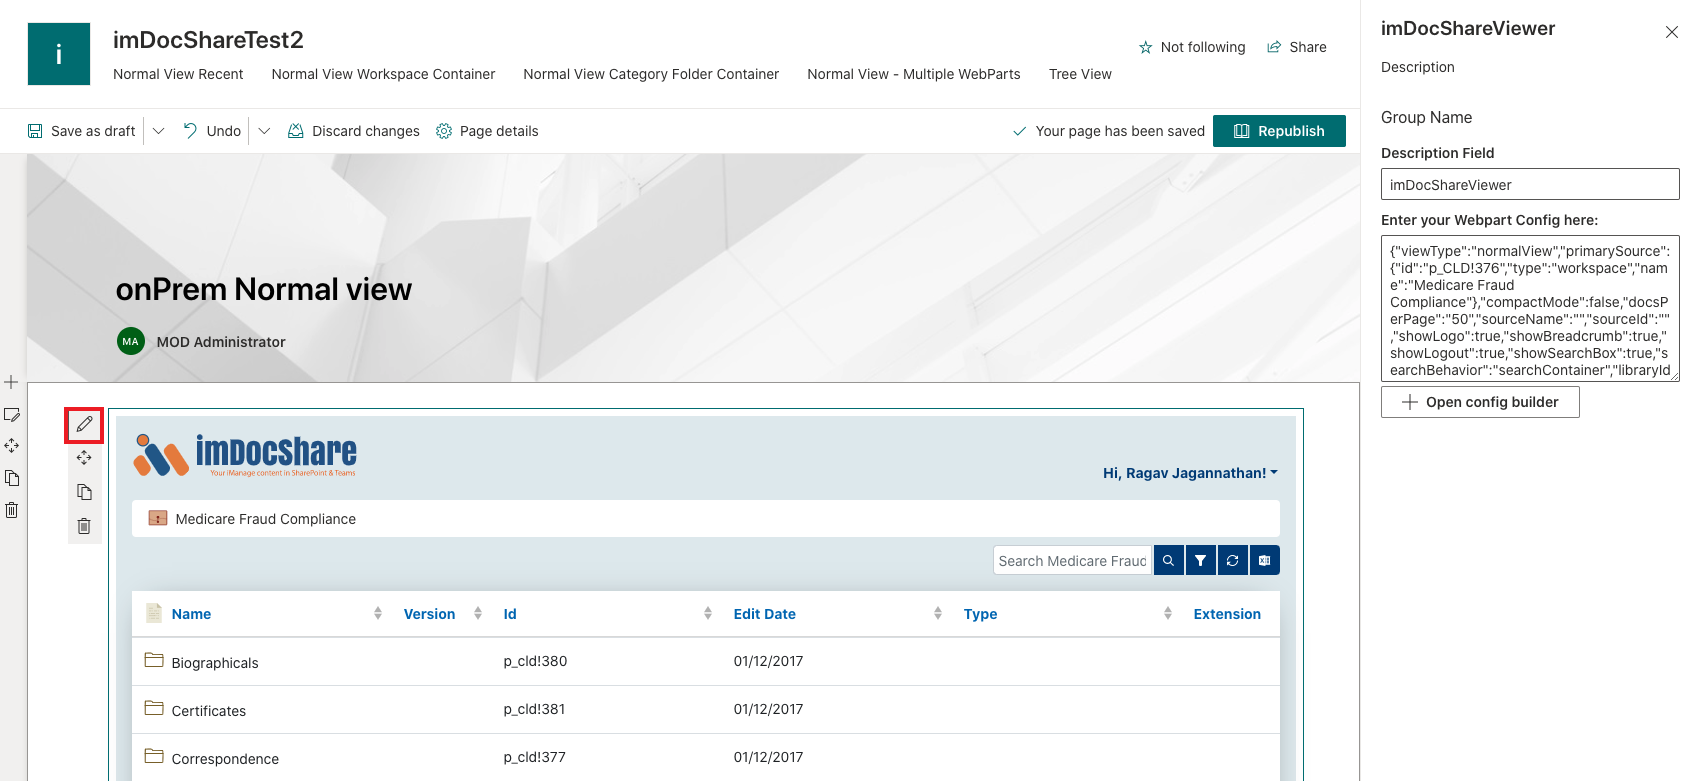
- Edit the App-Configuration Document Viewer JSON Object within the Text Editor – Webpage Dialog window, then click OK.

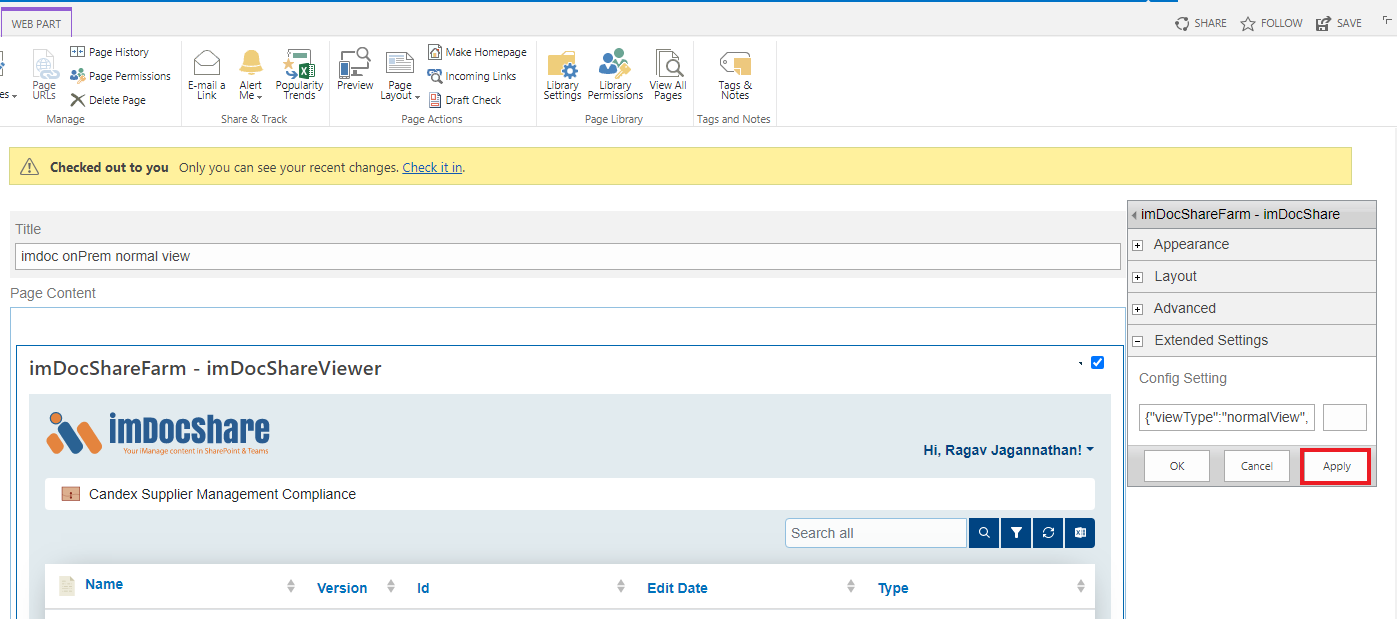
- Lastly click Apply.
Additional Feature: Compact Mode
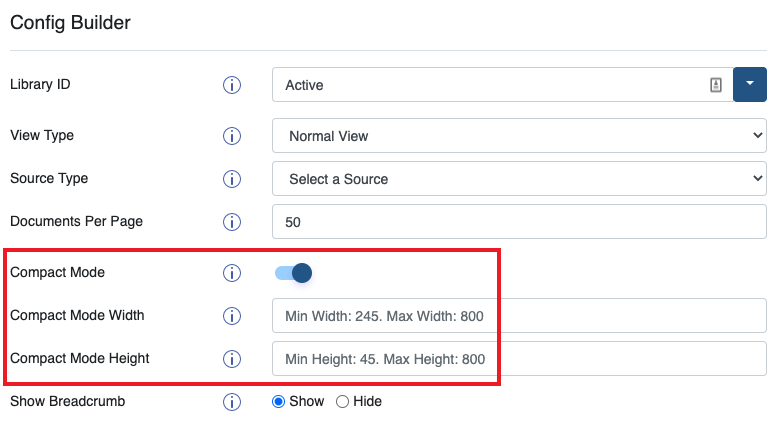
You can also enable compact mode from the Config Builder. This feature will enable the simplest form of imDocShare by only showing the list of files.

You can also modify the length and height of this table on Config Builder.
Classic vs Modern
Note: Make sure that the page created for the webpart is specifically a “webpart page” instead of “wiki page,” which is the default option. Clicking “new” to create a new page will default to wiki page. Working with webparts on a wiki page is possible, however, may cause unexpected issues.
Updating imDocShare TreeView WebPart
Much like the update process for Document Viewer, Recent Doc, and Saved Search Web Parts, you will edit your imDocShare TreeView Webpart by clicking on the Web Part Menu (small arrow in upper right-hand corner of Web Part), clicking Edit Web Part, click Extended Settings, and depending on whether you are using Internet Explorer browser, click the Ellipsis to the right of the Config Settings field, or if you are using any other browser, click within the Config Settings From there, you can directly edit the App-Configuration TreeView JSON Object. Don’t forget to click Apply when you’re done!
Classic vs Modern
Note: Make sure that the page created for the webpart is specifically a “webpart page” instead of “wiki page,” which is the default option. Clicking “new” to create a new page will default to wiki page.
Config Builder Properties Appendix
ImDocShare uses a JSON-formatted config object to customize views and webparts to suit a user’s needs. Below you will find a list of properties and their possible values. All properties should be editable in a more user-friendly fashion by using the SharePoint Config Builder webpart, however, more technical users can also edit these properties manually in the JSON.
Base Properties
Base properties are fundamental requirements of each webpart. They often set baseline properties that are required for the webpart to work in the first place.
- viewType is the property that tells SharePoint which imDocShare WebPart to load. The available values are: ‘normalView’, ‘treeView, ‘createConfig’.
- ClientId, and BaseUrl are needed to access the iManage Rest Api. This can only be obtained by making a new app on https://cloudimanage.com/. More info in the section entitled “Authenticating with iManage”.
- The IManagesBaseUrl is the root URL used to retrieve API content from the API servers. This will differ only between On-Prem enviroenments. For all cloud customers the baseURL should be: https://cloudimanage.com/.
- assetPath is the full path where static assets are stored and must be obtained during deploy. This config is mandatory as it is also used to determine licensing information.
If you are in SharePoint online (currently included in the config above) your asset path may look like the following:
https://{yourSharepointTenant}/sites/AppCatalog/ClientSideAssets/23dea53d-fbee-49c3-8b16-c6b586b0422f/
If you are on Share Point on Prem Your asset Path might look like the following:
https://{yourSharepointTenant}/SiteAssets/imDocShare/CDN/assets/images/folderIcons/
Source Properties
Normal View can be configured to show a specific source container. TreeView can be configured to show several source containers. The ‘primarySource’ property is used to control this.
- primarySource is the container object that you would like DocumentViewer to display. primarySource is always required, even if using a source that does not have an explicit source ID such as Recent Documents. primarySource can be a folder, workspace, Category, Search folder. In the case of a workspace, primarySource can look like
- “primarySource”: {“id”: “ ACTIVE!136″, “type”: “workspace”}
- A recent documents source will look like this “primarySource”: “recent”
- A favorites source will look like this: “primarySource”: “favorite”
- primarySource in Treeview will be an array of objects rather than a single object with properties. The format of the object does not change.
Optional Source Properties
Users may forgo the traditional usage of 12-digit IDs to identify source locations if they have unique identifiers already being used in SharePoint. In this case, we have set up a system in which the IDs can be stored in a separate SharePoint List which will translate the unique codes into the IDs that the webpart needs.
Display Properties
columnProperties are a collection of iManage properties by which you would like to see and sort you’re the metadata of your content. The Document Viewer WebPart displays “name” as the first default document property to display, and in this example, “Ext“, “id“, “createdBy“, “modified” are the next four customizable document properties to display. ‘Ext’ or extension translates to “Document type,” “DocId” to “Document Id,” “createdBy” to “Pillsbury author,” and “modified” to “Date modified” as seen below:

ImDocShare also supports the insertion of custom column properties. In order to use custom properties, please visit your iManage cabinet admin page, and make sure that the properties are enabled in the cabinet. When inserting the property into the ImDocShare config, the spelling and capitalization must match exactly to the attribute that you have defined in the profile Attributes section of iManage Admin.
Note: If you are creating a brand new column, it may take some time for the data to populate properly. Please wait a few minutes after creating the Profile Attribute for the data to be correctly associated in the iManage API.

In the figure below, you can see the custom column “Testing” has been implemented.

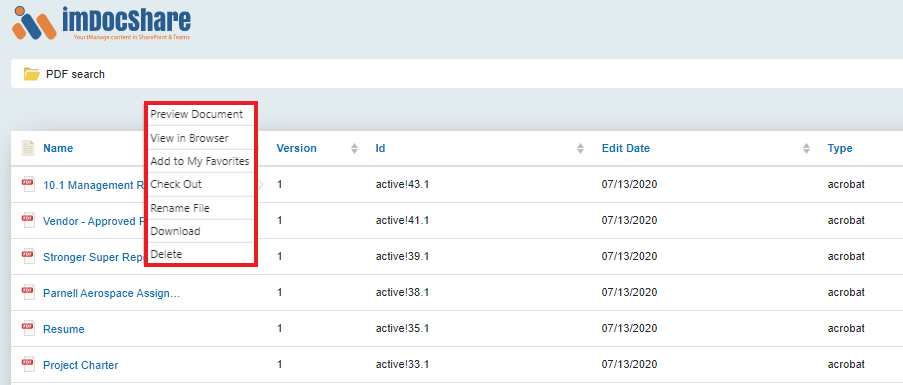
- contextMenu determines what options will appear in the dropdown context menu that is opened from clicking the “…” button beside each document. The contextMenu can be disabled by completely removing the key and value from the config object. Users can add other options indicated in the list below:
“download”,”delete”,”rename”,”favorites”,”checkOutIn”,”prevTab”,”prevBrowser”
If you omit the values for “contextMenu”, our webpart will select the default options. This can be changed by editing the JSON manually or picking the values from the corresponding dropdown menus in the config Builder. Please see an example of the context menu with all options turned on below:
Optional Display Properties
- ndThread is a property used to hide or show a second tab which will connect to the ndThread instance that is associated with the current container on the iManage ndThread site. Setting it to true will show the tab, setting it to false will hide it.
- menuSize property controls the size of the context menu mentioned in the above section. There are 3 sizes available: Small, Medium and Large, denoted by the letters ‘s’, ‘m’ and ‘l’. The default is small and omitting this property will set the webpart to use the default option.
- showLogout is a property which control whether or not the welcome message on the top right appears. This message can be clicked to reveal a small dropdown containing the ‘logout’ option. The default value is false, Omitting this value will set the value to false.
Note: On the Microsoft Teams implementation of our app, logout is required on every page, therefore this property is set to true and will not be editable by users - DefaultSortProperty is the default iManage property you would like to sort your documents, folders, saved searches, and filter searches by. Leaving this field empty means that the WebPart will default sort by the ‘name’ property, unless you are looking at a workspace, in which case the default sort property will be ‘Ext’ or extension.
Note: iManage Document Properties are case-sensitive, follow the official iManage spelling and character case as shown near the top of this user-guide. - filters is an array of key-value pairs, denoting specific iManage property filters you wish to place on the Web Part. The example above includes two filters for the document “property”: “Ext,” and the specific extension “value(s)”: “doc” and “pdf”. The filters array can take any specific filter-key-value-pair in relation to the list of iManage properties noted previously, and desired values for those properties.
- removeSort is a feature where user insert single or multiple column properties to turn off input column’s sorting and filtering capabilities by disabling and removing. The empty configs “removeSort”:[] is default.
Example: “removeSort”: [‘name’, ‘versions’] will disable both the name and versions column sorting and filtering.
User can disable sorting and filtering from the following list of column properties dependent on the property’s user had added to columnProperties:
“extension”, // Extension
“id”, // Document Id
“createdBy”, // Created by
“modified”, // Date modified
“aclStatus”, // Acl status
“created”, // Date created
“createdByGuid”, // created by GUID
“envId”, // Environment Id
“modifiedBy”, // Modified by
“modifiedByGuid”, // modifiedByGuid
“officialVer”, // Official version
“size”, // Size
“syncMod”, // syncMod
“url”, // URL
“versions”, // Versions
“client”, // Client Id
“matter”, // Matter Id
“filterColumn” // Document Type
-
- If you omit the values for “columnProperties”, our webpart will use the default properties: id, extension, createdBy and modified. This can be changed by editing the JSON manually or picking the values from the corresponding dropdown menus in the config Builder.
- showSearchBox is to show or hide the search box to execute filtering on the container contents or execute a full API search to the parent container.
Example: “showSearchBox” : true, //Accepts Boolean
- showLogo is to show or hide the imDocShare logo image at the top left. Note: Image can be customized by replacing the file in the static images library.
Example: “showLogo” : true, //Accepts Boolean
- For Normalview: showBreadCrumb is a property which hides or shows the bread crumb trail. A Breadcrumb trail allows you to navigate through multiple levels of nested folders.
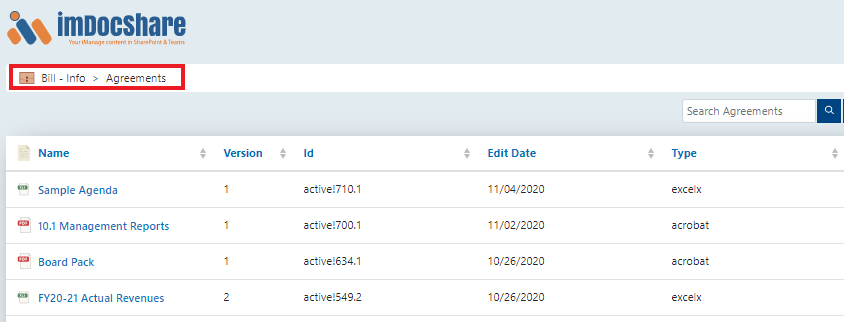
-
- Click on any part of the breadcrumb trail to go back to that location.
- For Treeview: TableDisplayDocsOnly is a property which determines what types of objects will appear in the right-side display table as opposed to the left-side navigation tree in Treeview. Setting this value to true will display ONLY documents in the display table. Setting this value to false will display BOTH documents AND subfolders in the display table. Regardless of this setting, subfolders will display on the left-side navigation tree.
- searchCriteria is search file files by criteria. The search criteria can filter files using extension, version, client, matter and doc type.
Example:
“searchCriteria” : {
“docType”: [“AGREE”, “CLOSING BINDER”], //Accepts string
“version”: [1], //Accepts int
“extension”: [“pdf”, “msg”], //Accepts string
“client”:[“1004”], //Accepts string
“matter”:[] //Accepts string
}
autoRefreshTimer will refresh the WebPart every 15+ seconds
Example: “autoRefreshTimer”: 15 //Accepts int that is bigger than 1
- authMsg is an optional value that is used to display an optional message that will be displayed when users authenticate with iManage. Administrators tend to use this feature to reassure users that the login popup is part of the document retrieval process. Please see the image below for an example:

If you are editing JSON manually, you may insert html and css elements as a string in order to display a customized message. For users editing using the JSON config Builder, we have provided a rich-text editor as seen below:

Note: iManage Configuration Properties are case-sensitive, follow the official spelling and character case as shown above.