Introduction
This document outlines the steps to complete installation for the On-Premises Proxy service required to use imDocShare with an On-Premises iManage Server. This is required due to the security requirements of an on-premises server.
Our application typically uses an online app service in order to query and authenticate with the iManage API server. For on-Premises implementations, this type of server is only accessible in the same intranet network and therefore will not respond to a public app service. Our solution is to install a proxy service which re-directs to our public service without exposing the iManage server to the internet at large.
Creating an App Service
The first step is to create a basic web app service using Azure.

Once the service is live, we will provide a package to deploy our app to the service. It is important that this service is set up in the same network as your iManage 10.x Work Server as this is required to query the server.
Package Deployment
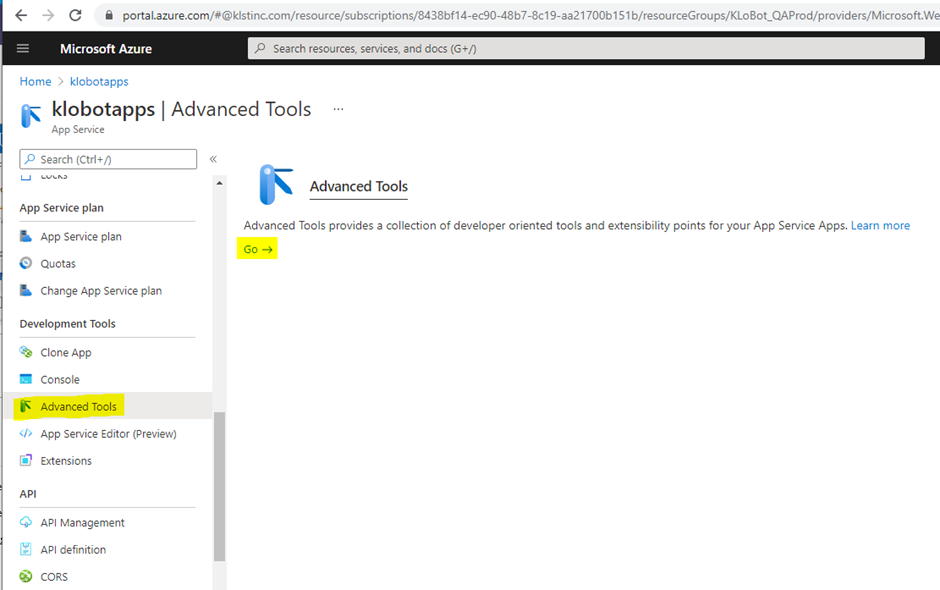
We will provide a package containing a .NET web app project to deploy to the service. Simply, unzip the file and use Azure’s built in KUDU advanced tool to deploy the contents to the service.

Once you have entered the debug console from the above screenshots, simply drag & drop the contents of the zip file into the root of the server directory. Once this is successful, your deployment is complete!
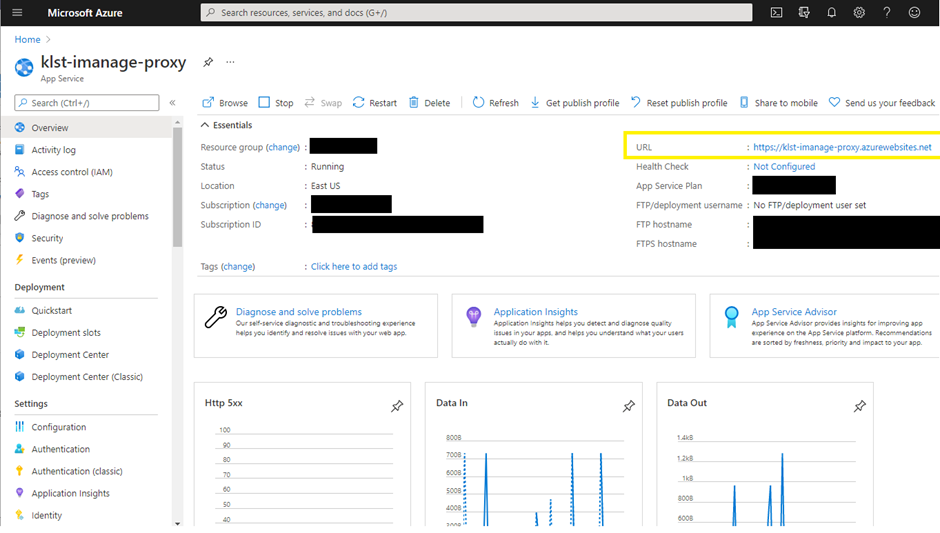
Once installation is complete, you will need to provide the URL property where the service can be reached. This needs to be saved in our records to process authentication and API access smoothly. This property can be found on the overview page of your service:
Testing your new Service
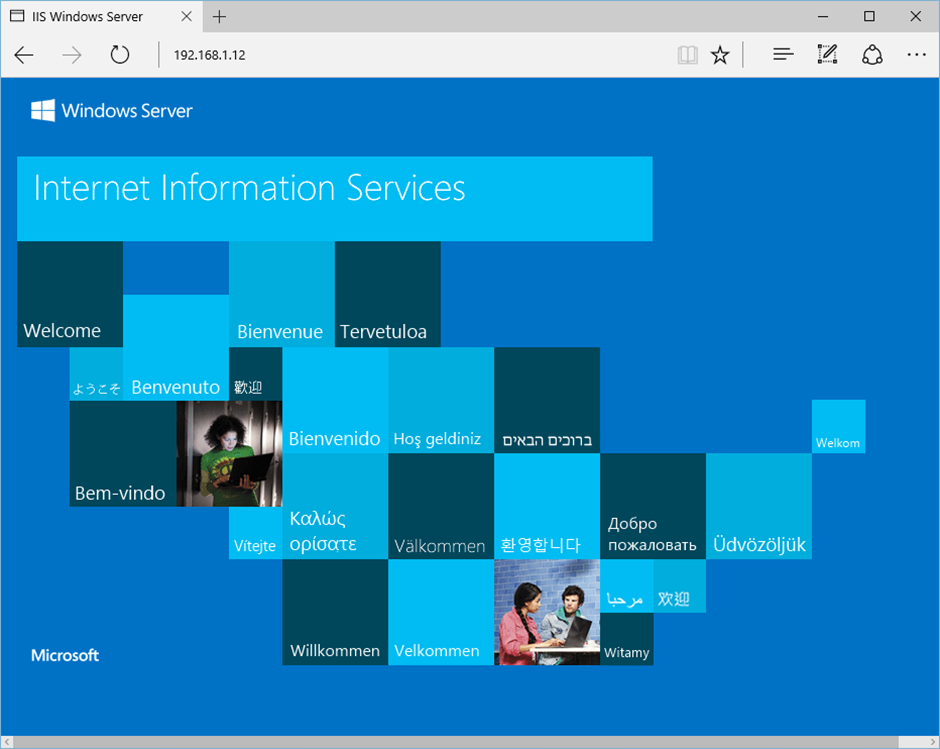
You can test your new service by visiting the URL above in an intranet environment. This URL should be reachable by machines in the same network. If the deployment was successful, you should see an imDocShare logo.
Installing Proxy App in IIS web server
Configure IIS features for Windows Server 2016
(It is similar for Windows Server 2019)
Follow the steps below to install Internet Information Services (IIS) on a web server computer running Windows Server 2016.
The minimum Internet Information Services (IIS) version is 10.0.
1) Click Start > Server Manager.
2) On the Server Manager > Dashboard, select Add roles and features.
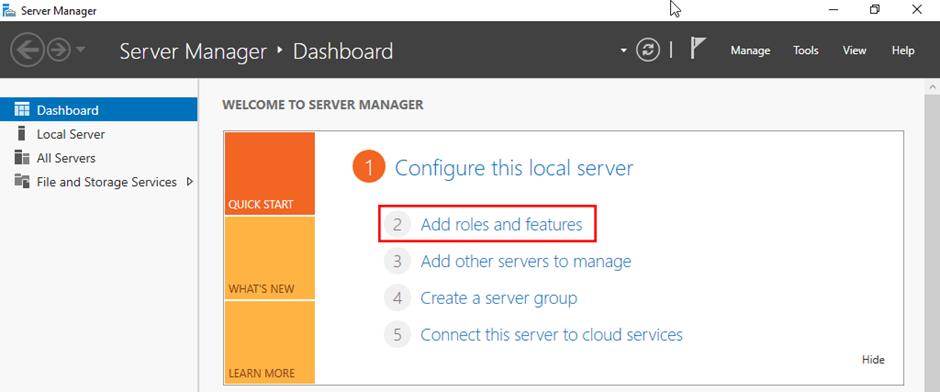
The Add Roles and Features Wizard opens.
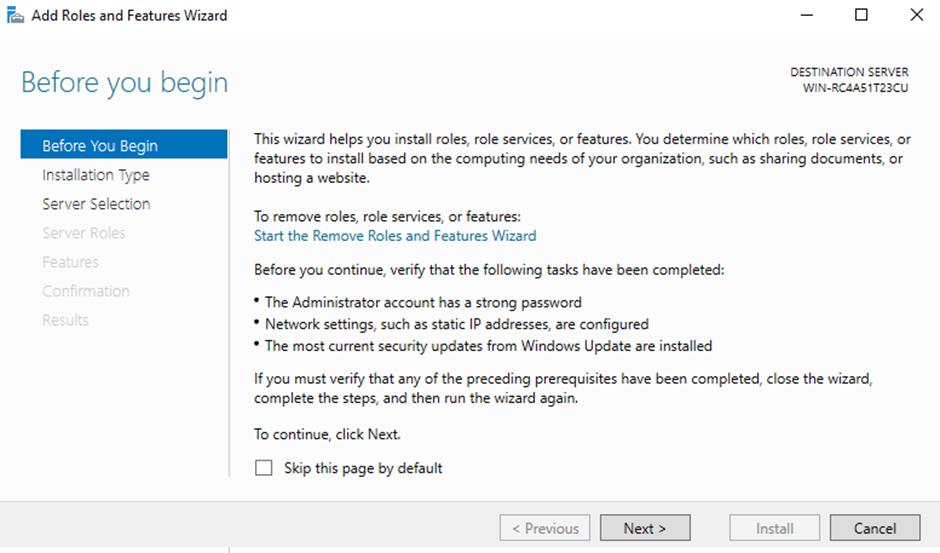
3) Click Next on the Before you begin window.
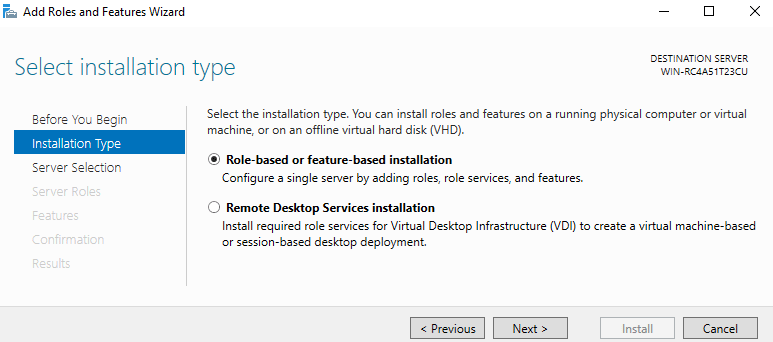
4) On the Select installation type window, select Role-based or feature-based installation, and then click Next.
5) On the Select destination server page, select the server to configure in the Server Pool list.
6) Click Next.
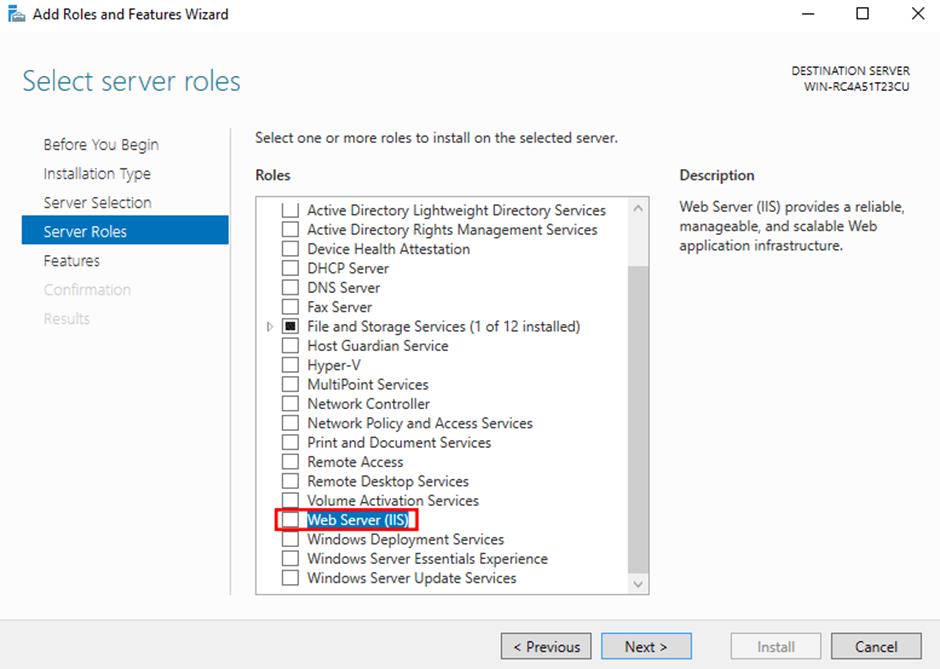
7) On the Select server roles window, select the Web Server (IIS).
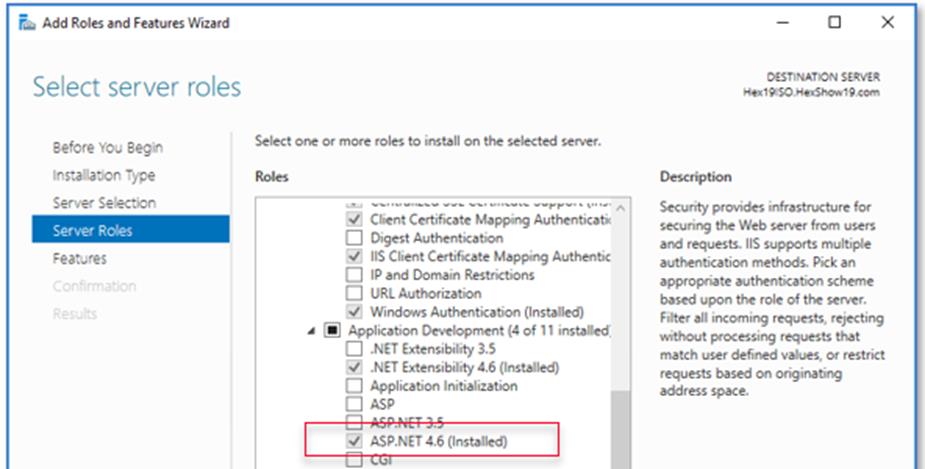
8) Expand Web Server(IIS), then Web Server, and then the Application Development node, and verify that ASP.NET 4.6 or later is installed.
9) Click Next.
10) Click Next on the Select features window. No additional features are needed.
11) Click Next on the Web Server Role (IIS) window after reading the information provided.
12) Click Next on the subsequent page to install the defaults.
13) On the Confirm installation selections, review the items to be installed. Click Next when you are ready to proceed with installing the IIS web server.
14) After installation has succeeded, click Close.
Install imDocShare Proxy app
After installing IIS, run IIS Manager to make sure that the .NET Framework version 4 is assigned to the default application pool.
1) Press WINDOWS+R to open the Run dialog box.
2) Enter “inetmgr” and select OK.
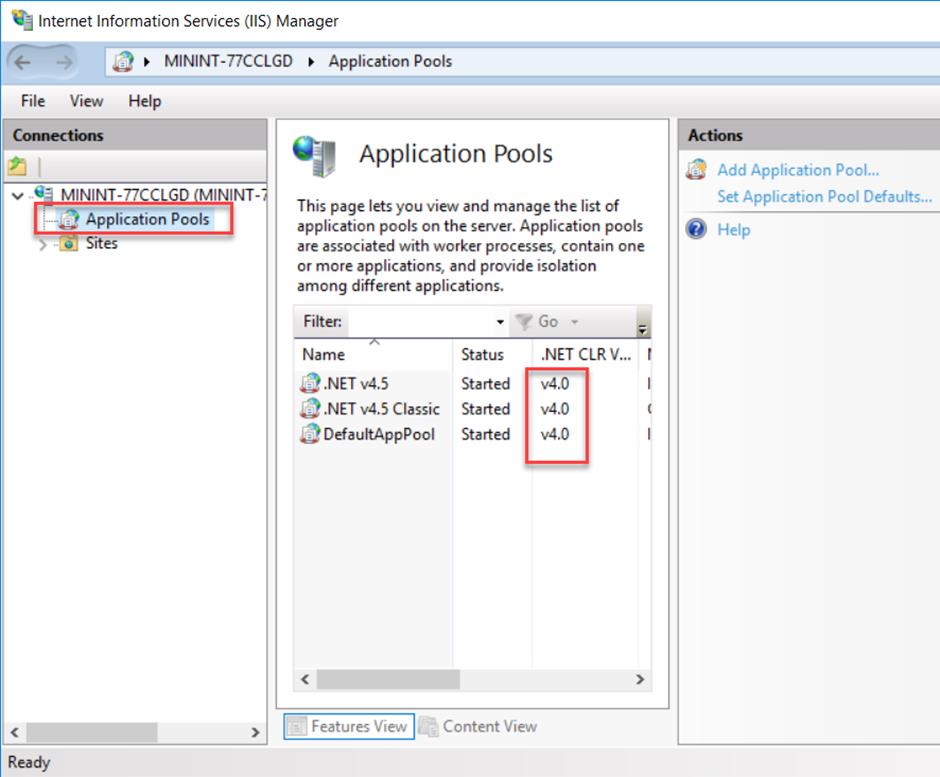
3) In the Connections pane, expand the server node and select Application Pools. In the Application Pools pane if DefaultAppPool is assigned to the .NET framework version 4 as in the following illustration, skip to the next section.
4) In the Application Pools pane, select DefaultAppPool. In the Actions pane, select Basic Settings.
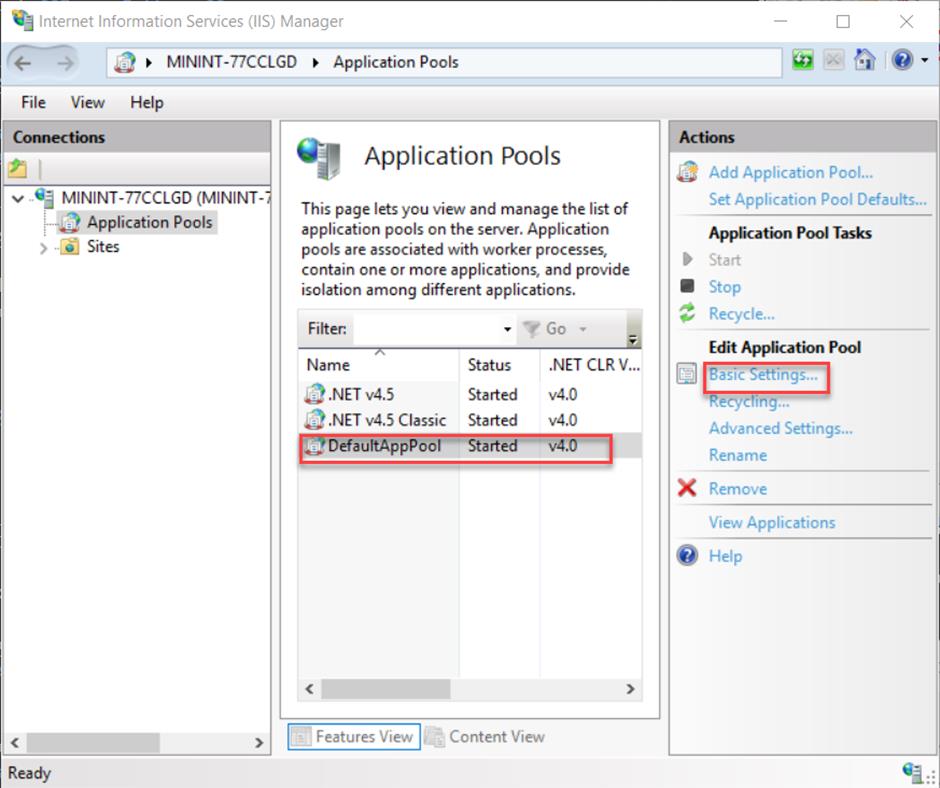
5) In the Edit Application Pool dialog box, check the .NET CLR version. Change to .NET CLR v4.0.30319 if it is not. Click OK.

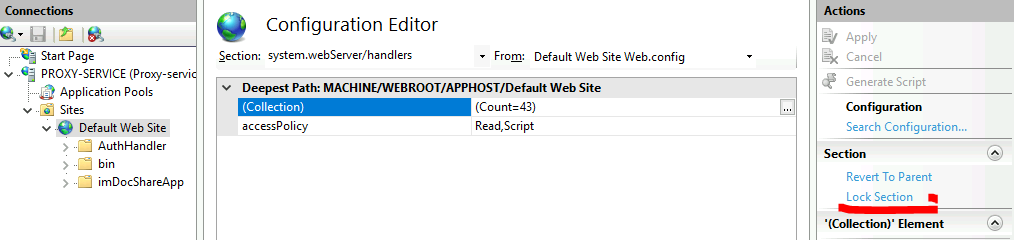
6) In the connections panel select the Default Web Site (or the web site created for this service).
7) Double click the Configuration Editor and make sure the webserver/handlers handler is enabled.
At this point IIS should be running on port 80 by default with the firewall rule “World Wide Web Services (HTTP Traffic-In)” enabled in Windows firewall automatically. We can perform a simple test by opening a web browser and browsing to the server that we have installed IIS on. You should see the default IIS page. You can use http://localhost to connect with in server.
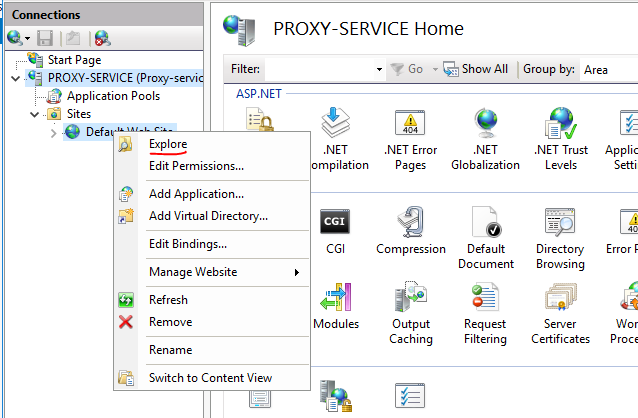
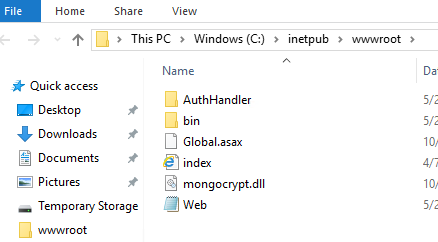
8) Right click Default Web Site and select Explore (This opens the default Site physical location on Windows Server C:\inetpub\wwwroot).
9) Extract the contents of imDocShare Proxy-vx.x.x.zip into the wwwroot folder.
10) Please navigate to thehttps://sync.imdocshare.com/proxysetting/index.html and fill the form.
Note: Please make sure the iManage Host Name and Redirect URL are HTTPS URL and not HTTP.
You can get the client ID and Secret after creating an app for imDocShare in your iManage control center, to create an app please navigate to your iManage tenant using an admin account, click on the user icon on the top right, navigate to the control center and select applications, here you can
add an application by selecting the “Add Application” button on the top right of the screen. When creating the application the redirect URL should be - https://<your proxy domain>/api/v1.0/authorized.
Please also enable the “Allow refresh token”
11) Please open the web.config file in the root folder and input the encoded value in the “iManagesettings” field.
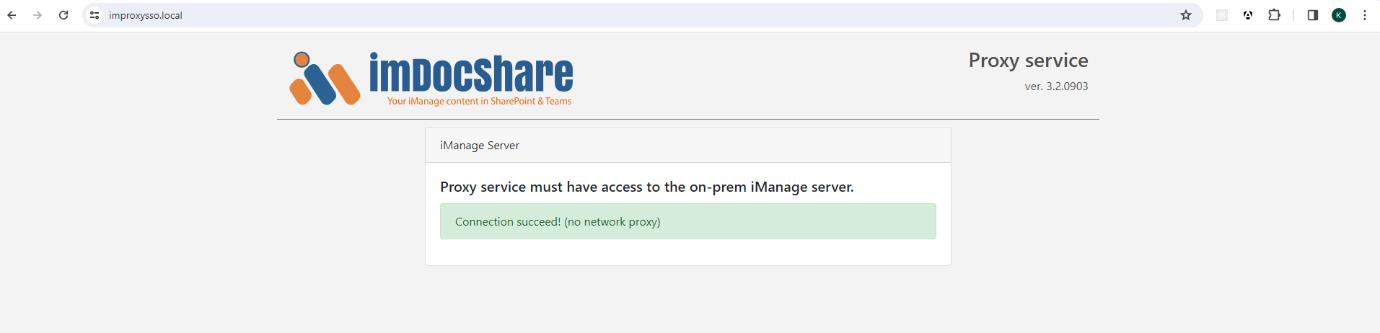
11) Once configured please navigate to https://localhost or https://(yourproxydomain), if successful you will see the connection established:
Install SSL certificate
SSL Certificate should be purchased from a proper Certificate provider, or your network admin can produce one for your internal network. That depends on your organization. To add an SSL certificate to IIS these steps to be followed.
- You must download the certificate for IIS web server.
- Since the certificate providers are common to all other server technologies too.
Create Certificate Signing Request Using IIS (CSR)
When you are applying or ordering an SSL certificate, you will need to create CSR (Certificate Signing Request) on your server and send it to a Certificate Authority. The CSR validates the information the CA requires to issue a certificate. After validating the CSR, the Certificate Authority will use this data to generate and issue the SSL certificate.
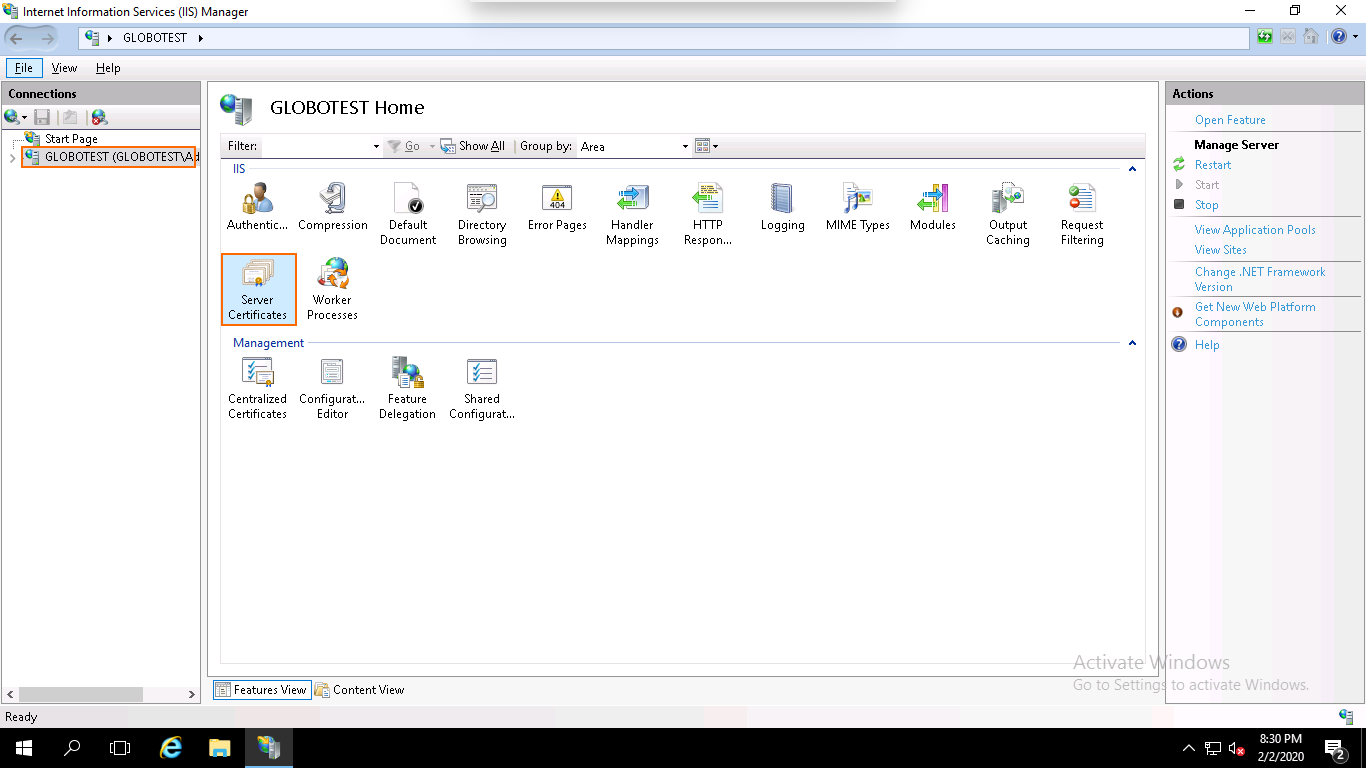
1) Go to Start > Administrative Tools > Internet Information Services (IIS) Manager.
2) In the left pane, click on the server’s name and double click on the Server Certificates.
3) In the right pane, click on the Create Certificate Request.
4) Provide your domain name, company name, department name, city, state, country name and click on the Next button.
5) Select the Cryptographic Service Provider, 2048 as a bit length and click on the Next button.
5) Specify the filename and the location where you want to save the CSR and click on the Finish button to create a CSR certificate.
6) After generating the CSR, you will need to give this CSR file to the Certificate Provider in order to purchase the new SSL certificate.
Install the SSL on IIS Website
Make sure that you get an SSL certificate in P7B or CER format. Once you received the SSL certificate file from the Certificate Authority save it on the server where you created the CSR. It should be IIS compactible.
1) Go to Start > Administrative Tools > Internet Information Services (IIS) Manager.
2) In the left pane, click on the server’s name and double click on the Server Certificates.
3) In the right pane, click on Complete Certificate Request.
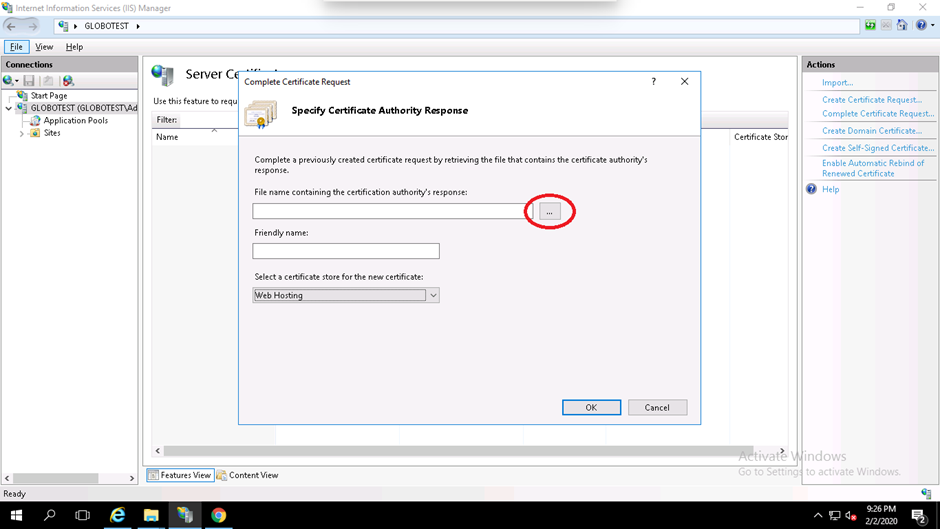
4) Browse the certificate file (.cer), provide your domain name, select Web Hosting in the certificate store option and click on the OK button.
Assign the certificate
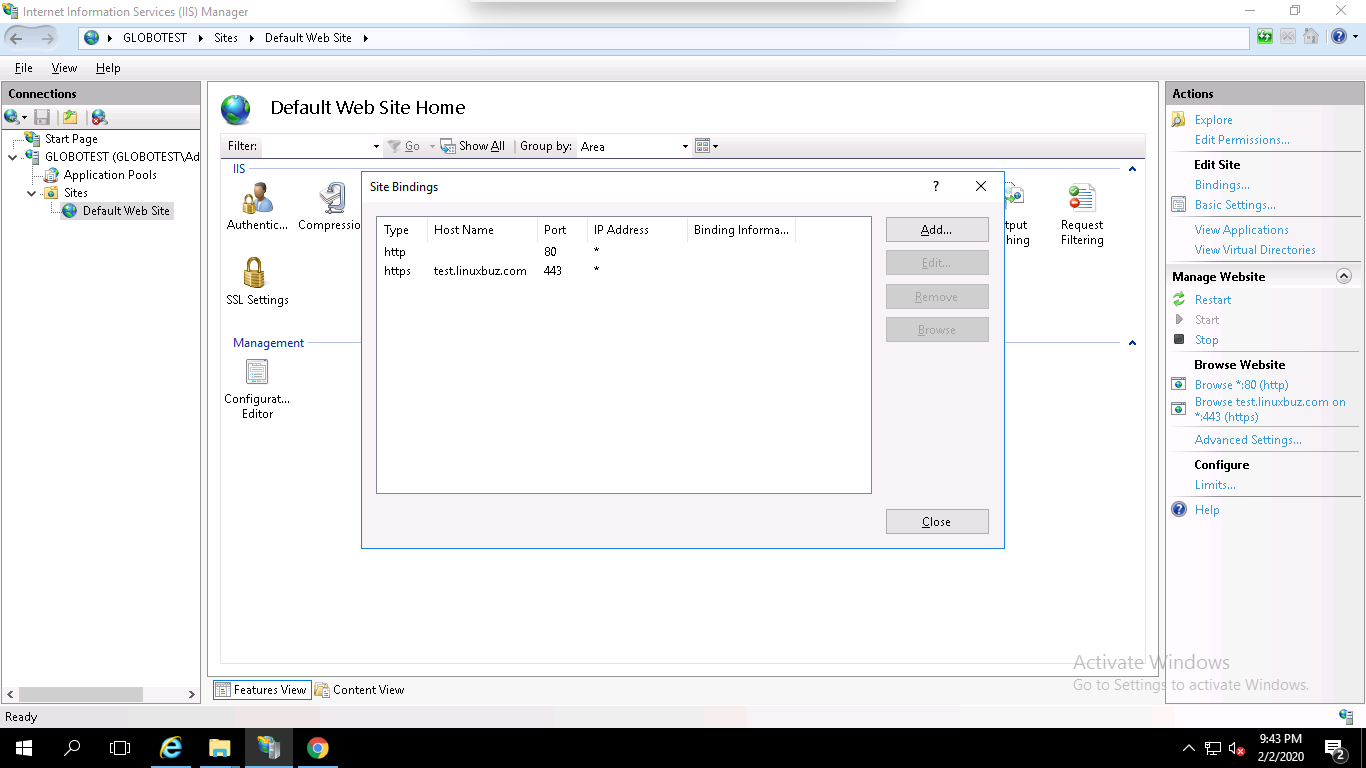
At this point, you have successfully installed your SSL certificate. Next, you will need to assign the certificate to your website.
1) Open the IIS Manager, expand the server’s name and click on the Default Website or the Site you created for Proxy Service, then click on the Bindings in the right pane.
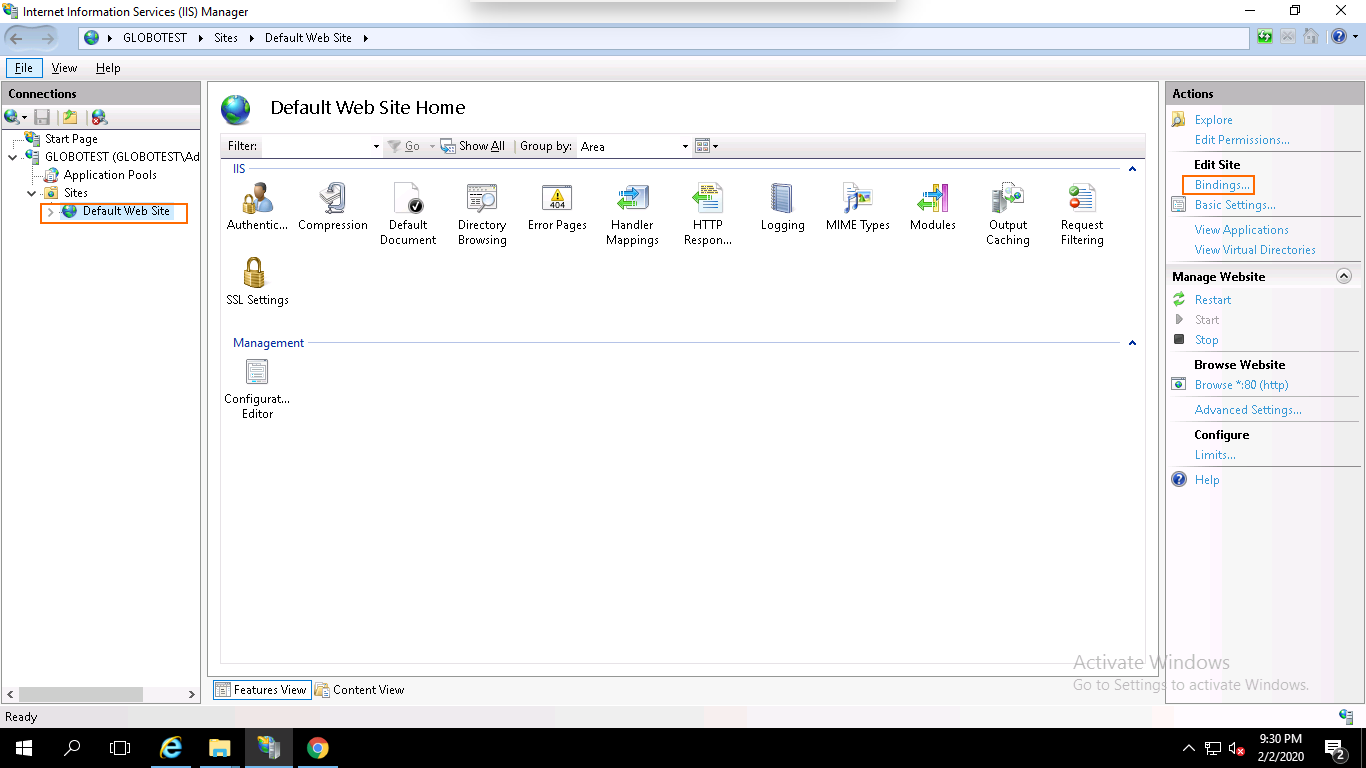
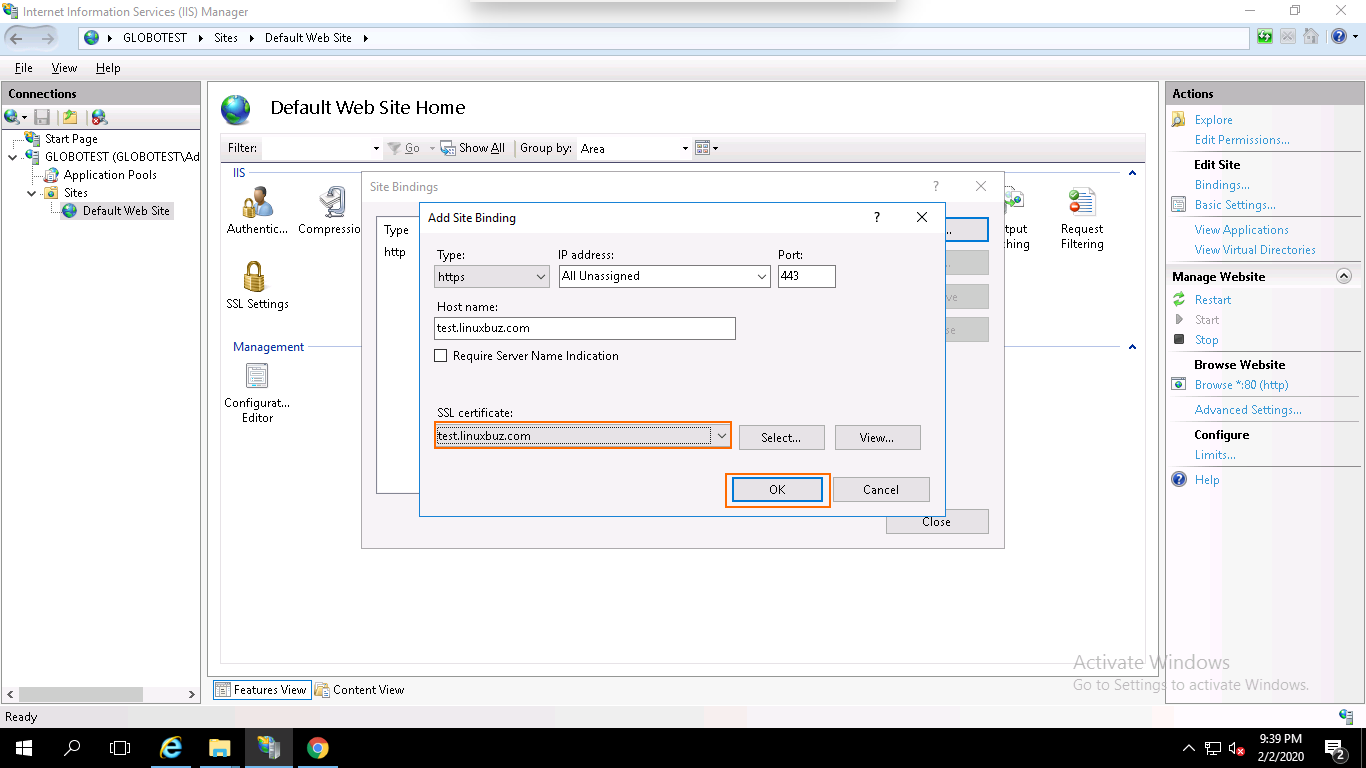
2) Click on the Add button.
3) Select https, select the IP address of your website or leave it unassigned, type port 443, type your domain name, select the domain name on which you want to install SSL and click on the OK button to install the certificate.
Your SSL certificate is now installed, and the website configured to accept secure connections.